DIY Amiga keyboard
Idea
While sanding the case I got time to think and it got me that I haven't owned a real Amiga keyboard since we sold our Amiga 600 in childhood. I've always been using a PC keyboard with my A1200.
I really wanted a one with swedish/finnish layout, but they are really hard to find and if you happen to see one on sale it will cost very much. So I started to google around and I found out that you can actually use a Amiga 500 as external keyboard with small modification. You just need to remove the Q1 transistor to get the Ctrl+A+A reset to work.
Modeling and making
I started to look for a Amiga 500 keyboard which I could use to create my own external keyboard. I was lucky and found out that my old colleague had one with some missing keys so I bought it from him. He also had a A4000 keyboard so I took a lot of measurements and later opened Fusion 360 for making a model of the case. The missing keycaps I was able to find from a Facebook group for very reasonable price. They were very yellowed so I knew I had to do something with the keycaps.


For being able to print the case with my Prusa Mini the max size of each part with supports was 180x180mm. Luckily I was able to fit the design so that I could print top and bottom cover with three parts each.

After making the model I printed the parts with white PLA. The parts bent a bit when removing the support material, but all in all the result was quite good already as such.

After printing it was just gluing the parts together and then filling, sanding, filling, sanding and so on. I used some hot air to get some bending away and eventually I was happy with the finish. Then it was time to paint. I used same paints as with the A1200 case. White primer, white base color, metal flake and then glossy lacque.
Keycaps
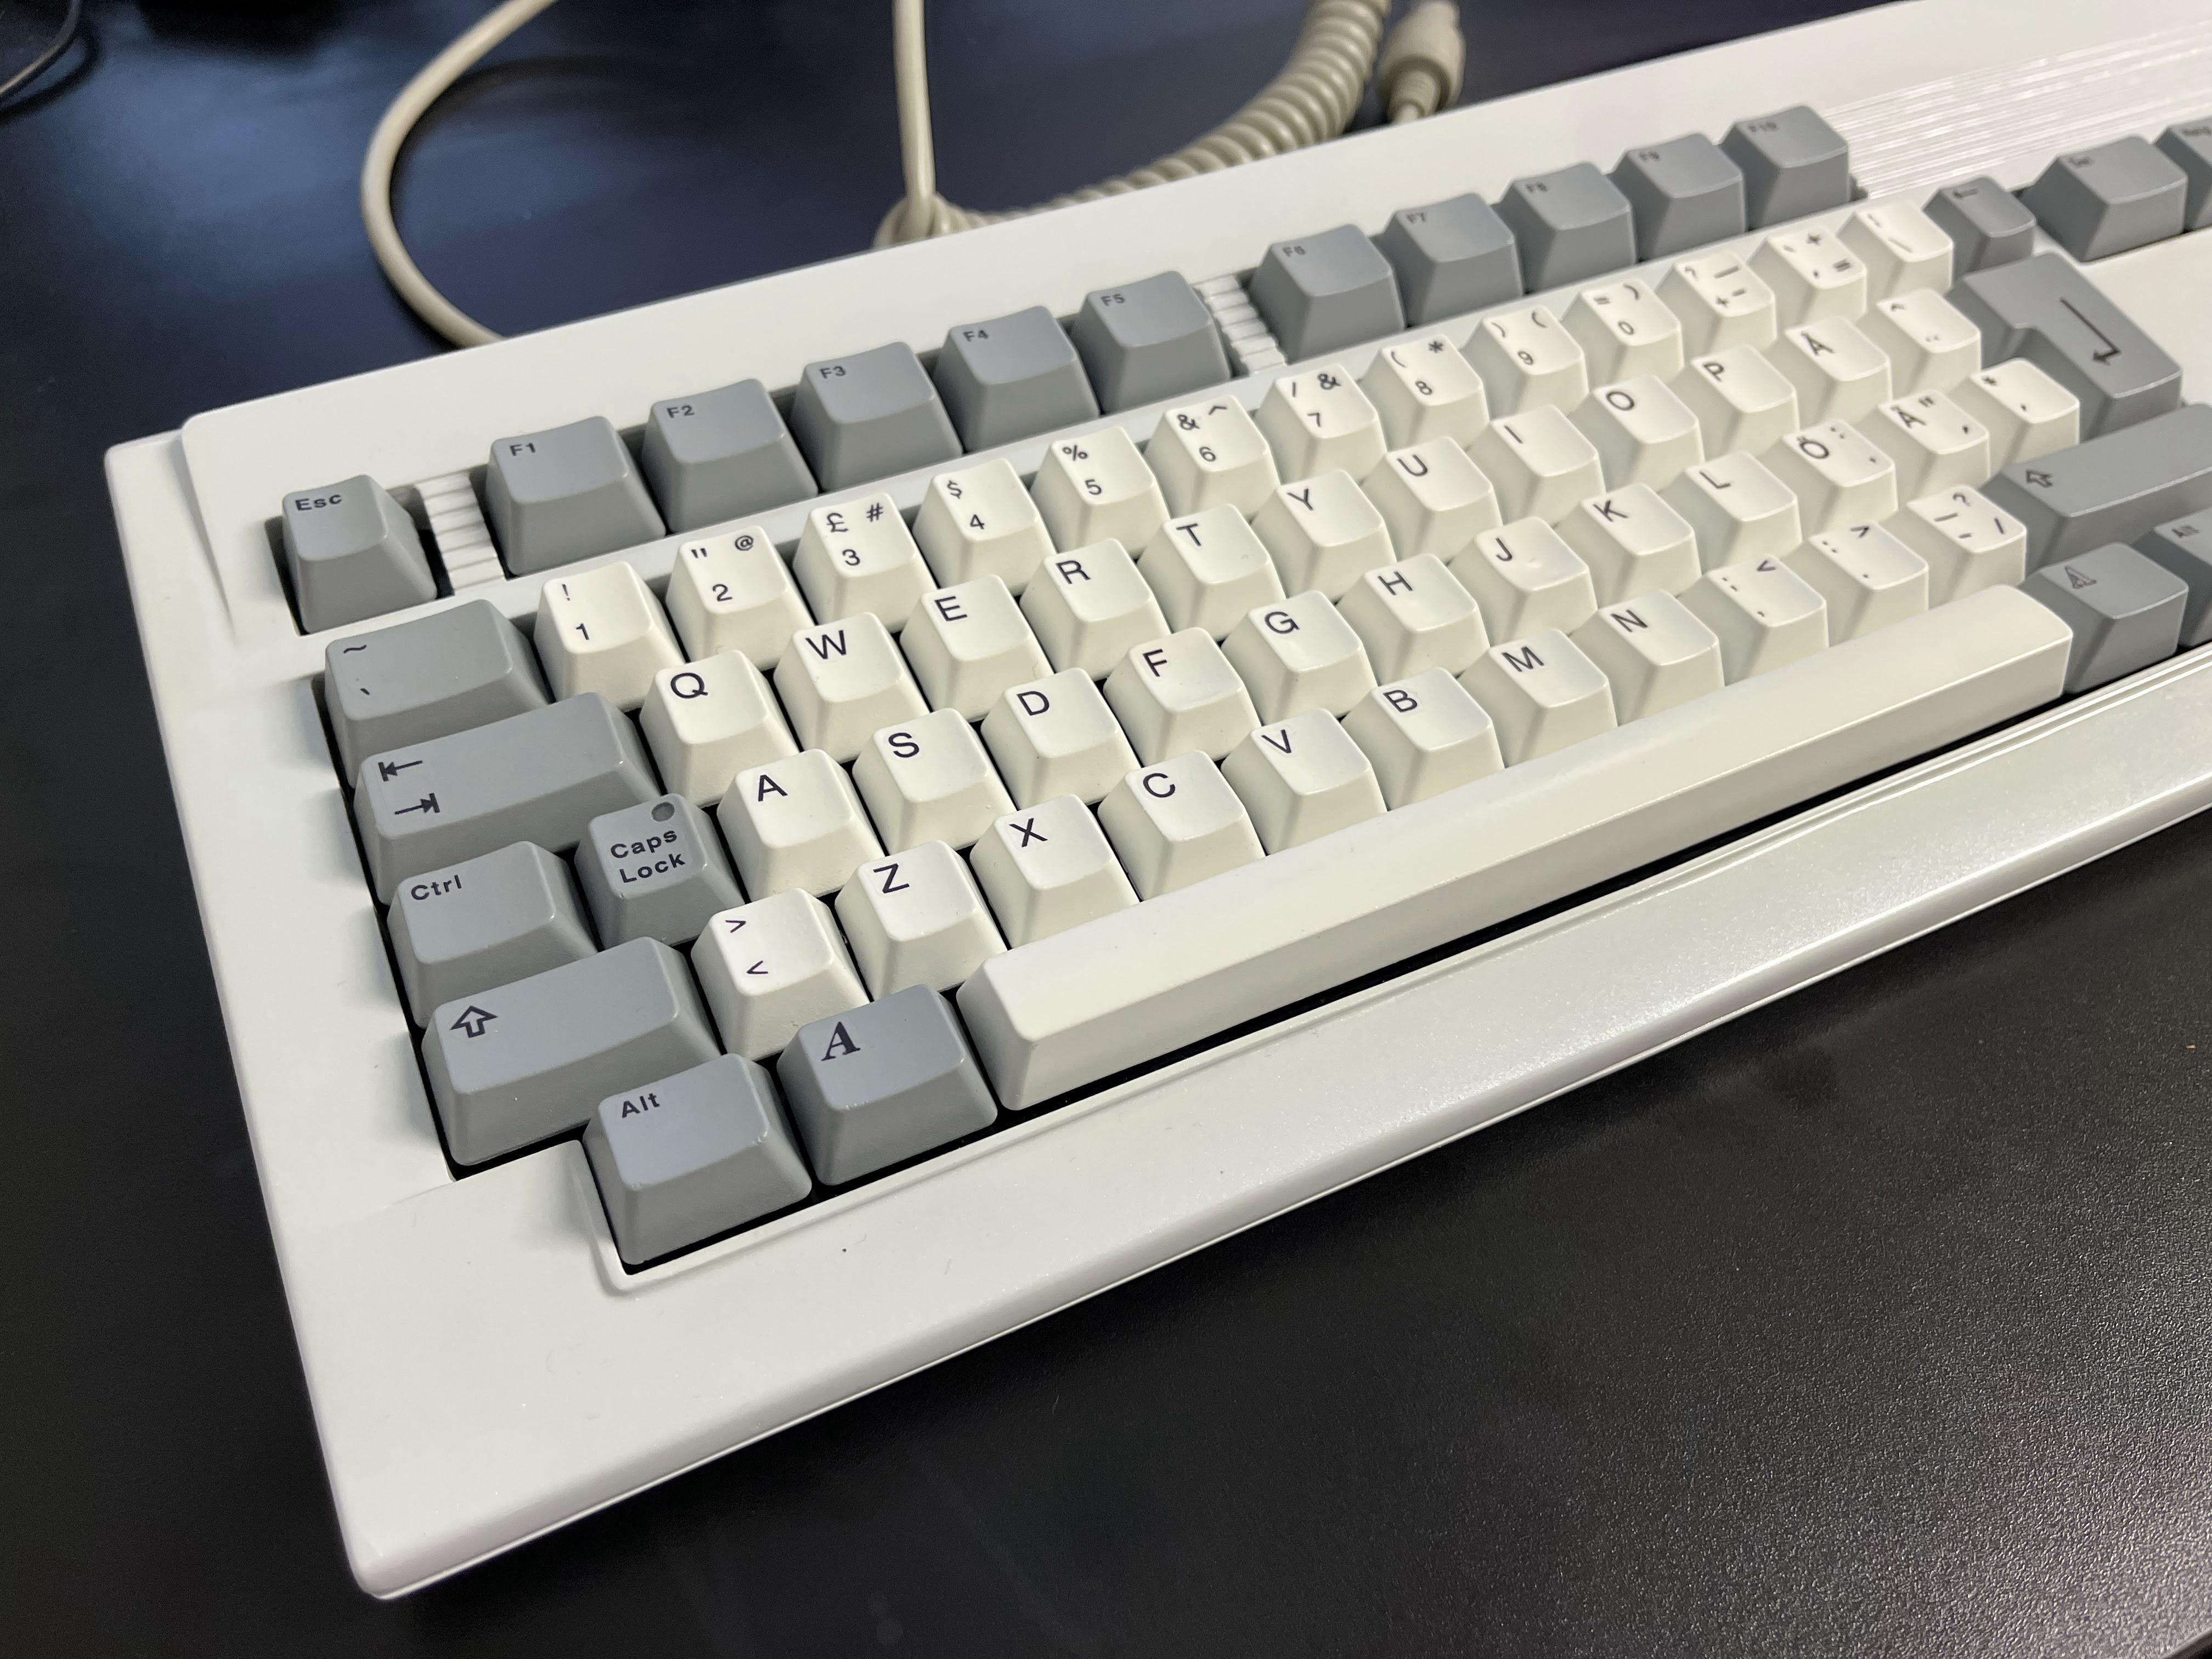
I had to do something with the keycaps as some of them were badly yellowed and rest were Amiga 500 colored and not white as in A1200 and A4000 keyboards. After some studying I found from YouTube a RetroShack's video where he painted his A1200 keycaps and used decals for new prints. This looked pretty much perfect so I went with this route.

First I sanded the old markings from the keycaps slightly. Then I primed the keycaps with plastic primer followed by white primer. Then just white and grey paint depending on the key.


I used the same decal sheet also for the logo on the keyboard case before applying the last layer of glossy lacque.

The end result
The cable is from old PC keyboard. I also upgraded the keys from using springs to use the rubber domes from Mitsumi KPQ PC keyboard as in Amiga 3000 keyboard, it makes the keys feel much better. I'm pretty pleased with the end result. There's some minor things in paint job and some figures after sanding that are not perfect but I really like the shining looks.


You can download the model for the case from https://www.printables.com/model/294898-amiga-keyboard-case And here is the pdf for the keycap symbols


Comments
Post a Comment