Printing
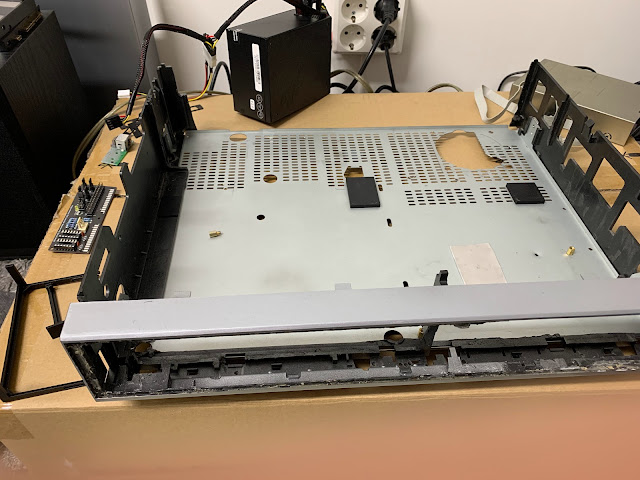
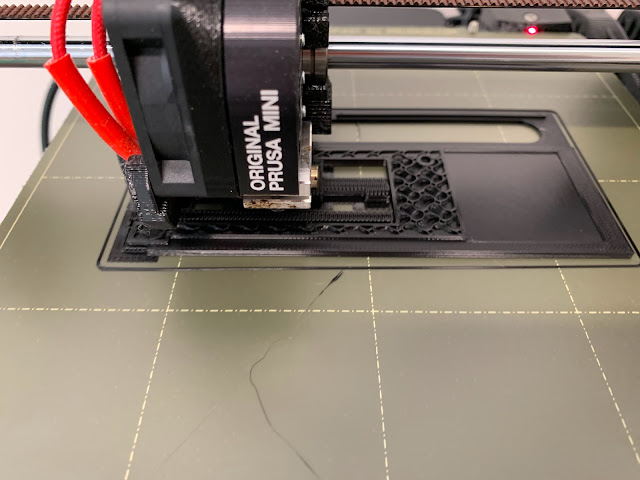
I printed the front panel in three parts, or actually seven, but with three main parts. The other four are sleeves for the power button and knobs plus connector bay. I used black PLA and 0,15mm layer height. My measurements were pretty much spot-on so I didn't have to redo any of the panel parts. What helped in this was the fact that I made many small test prints for different sections of the panel. I also printed some support blocks for the Amiga motherboard.
Empty case with motherboard supports
Printing the panel parts
Test print for floppy drive alignment
After I had all the pieces ready I glued them together with super glue and then reinforced the seams with epoxy glue.
All the parts printed and test fitted with connectors
Parts glued together and seams filled
Making it look nice
After the parts were in place I took plastic putty and filled all the holes and then put also thin layer all over the panel to fill the tiny gaps from printing. After wet sanding I painted the primer so I could see easily which parts still needed more putty. It took few rounds until I was satisfied.
While sanding the panel I had time to think and then I realized that I need to change my plans about the titan color of the case. (Almost) all Amigas have been beige/white and I really like it so, so why wouldn't I paint this one also white. I ended up with plan to have really glossy white with metallic look.
Primer painted to see the faults
I looked the image search results for different metallic white cars and found some that I wrote down and went to paint shop. I ended up using GM color olympic white (40R) as base color because I happened to have a can of that already and then bought VAG metallic lacque can which was part of color Oryxweiss and a glossy lacque on top of it.
That combination worked very well. The color is clean white and glossy and when the light hits the surface in angle you can see the metallic flakes.
Fresh paint
Power button sleeve
Front panel painted
After painting the white color I sanded the paint slightly to get rid of small dust particles and other errors and then used Farecla G10 finishing compound to get the shine back. Then I painted the metal flake paint and the glossy lacque. And same finishing methods also for the lacque layer.
Paint job done
Labels
I wanted to have markings on the front panel in the same style as my A/V received had. I tried to find a way to create labels which would be without noticeable edges. I ended up ordering Herma transparent labels which were sold with "no-label effect" sadly it wasn't quite true. I printed the markings and used the acrylic lacque to protect the print, but when looked closely you can easily see the edges of the labels. Fortunately I later found another method that had better end result (future blog post about that).
Labels printed with inkjet
Labels fitted
Laser cutting
Some libraries here offer have laser cutter that one can use
just by paying the material costs. While that was not possible in my town, my brother had that possibility so I hired him to make the acrylic panel for me. The panel is 3mm thick smoke colored and with black background it works very nicely. I was planning to cover the DVD drive led, but it actually looks pretty good so I let it be visible. The difference to the old handmade panel is quite drastic.
New vs old
Back panel
Back panel is also made with black PLA and in three parts. This I printed twice. Primarily because there were some minor design flaws (with Ethernet connection and leds) and secondarily because I wanted to get the case together temporarily as I was to take it to an event.
There's supports for PSU, audio knobs, Ethernet connector and HDMI connector, but otherwise it is pretty much straight panel with some holes. Again, I made small test prints for each connector before printing the hole panel to not create so much scrap pieces.
Back panel is painted semi flat black and stickers are printed to non-glossy Herma sticker sheet. After printing the I tried to apply a coat of semi flat lacque over before applying them but I didn't like the uneven look of the surface so I printed a new set and applied them as they were.
Back panel with stickers
Ready back panel was glued to the rest of the case with super glue and epoxy.

Shiny and ready


Comments
Post a Comment